

Events in SORA
Events are a crucial part of the Soroban development workflow in SORA. They allow you to monitor and interact with contract events on the Stellar network, providing valuable insights into your smart contract operations.
SHOWCASE CLIP
New to SORA? Watch our comprehensive demo video to get started quickly with managing events!
Events Dashboard
The Events Dashboard is your central hub for managing all contract events across your Soroban projects in SORA.

Key features of the Events Dashboard include:
- Event List: Displays all your contract events with details such as Start Ledger, Event Type, Network, and RPC URL.
- Search Bar: Allows you to quickly find specific events across all your projects.
- Add New Event: A button to initiate the event creation process.
- Pagination: Navigate through your events if you have more than fit on one page.
- Rows per Page: Adjust the number of events displayed per page.
Adding a New Event
To add a new contract event:
- Click the "Add New Event" button in the top right corner.
- A modal will appear with fields to configure your new event.
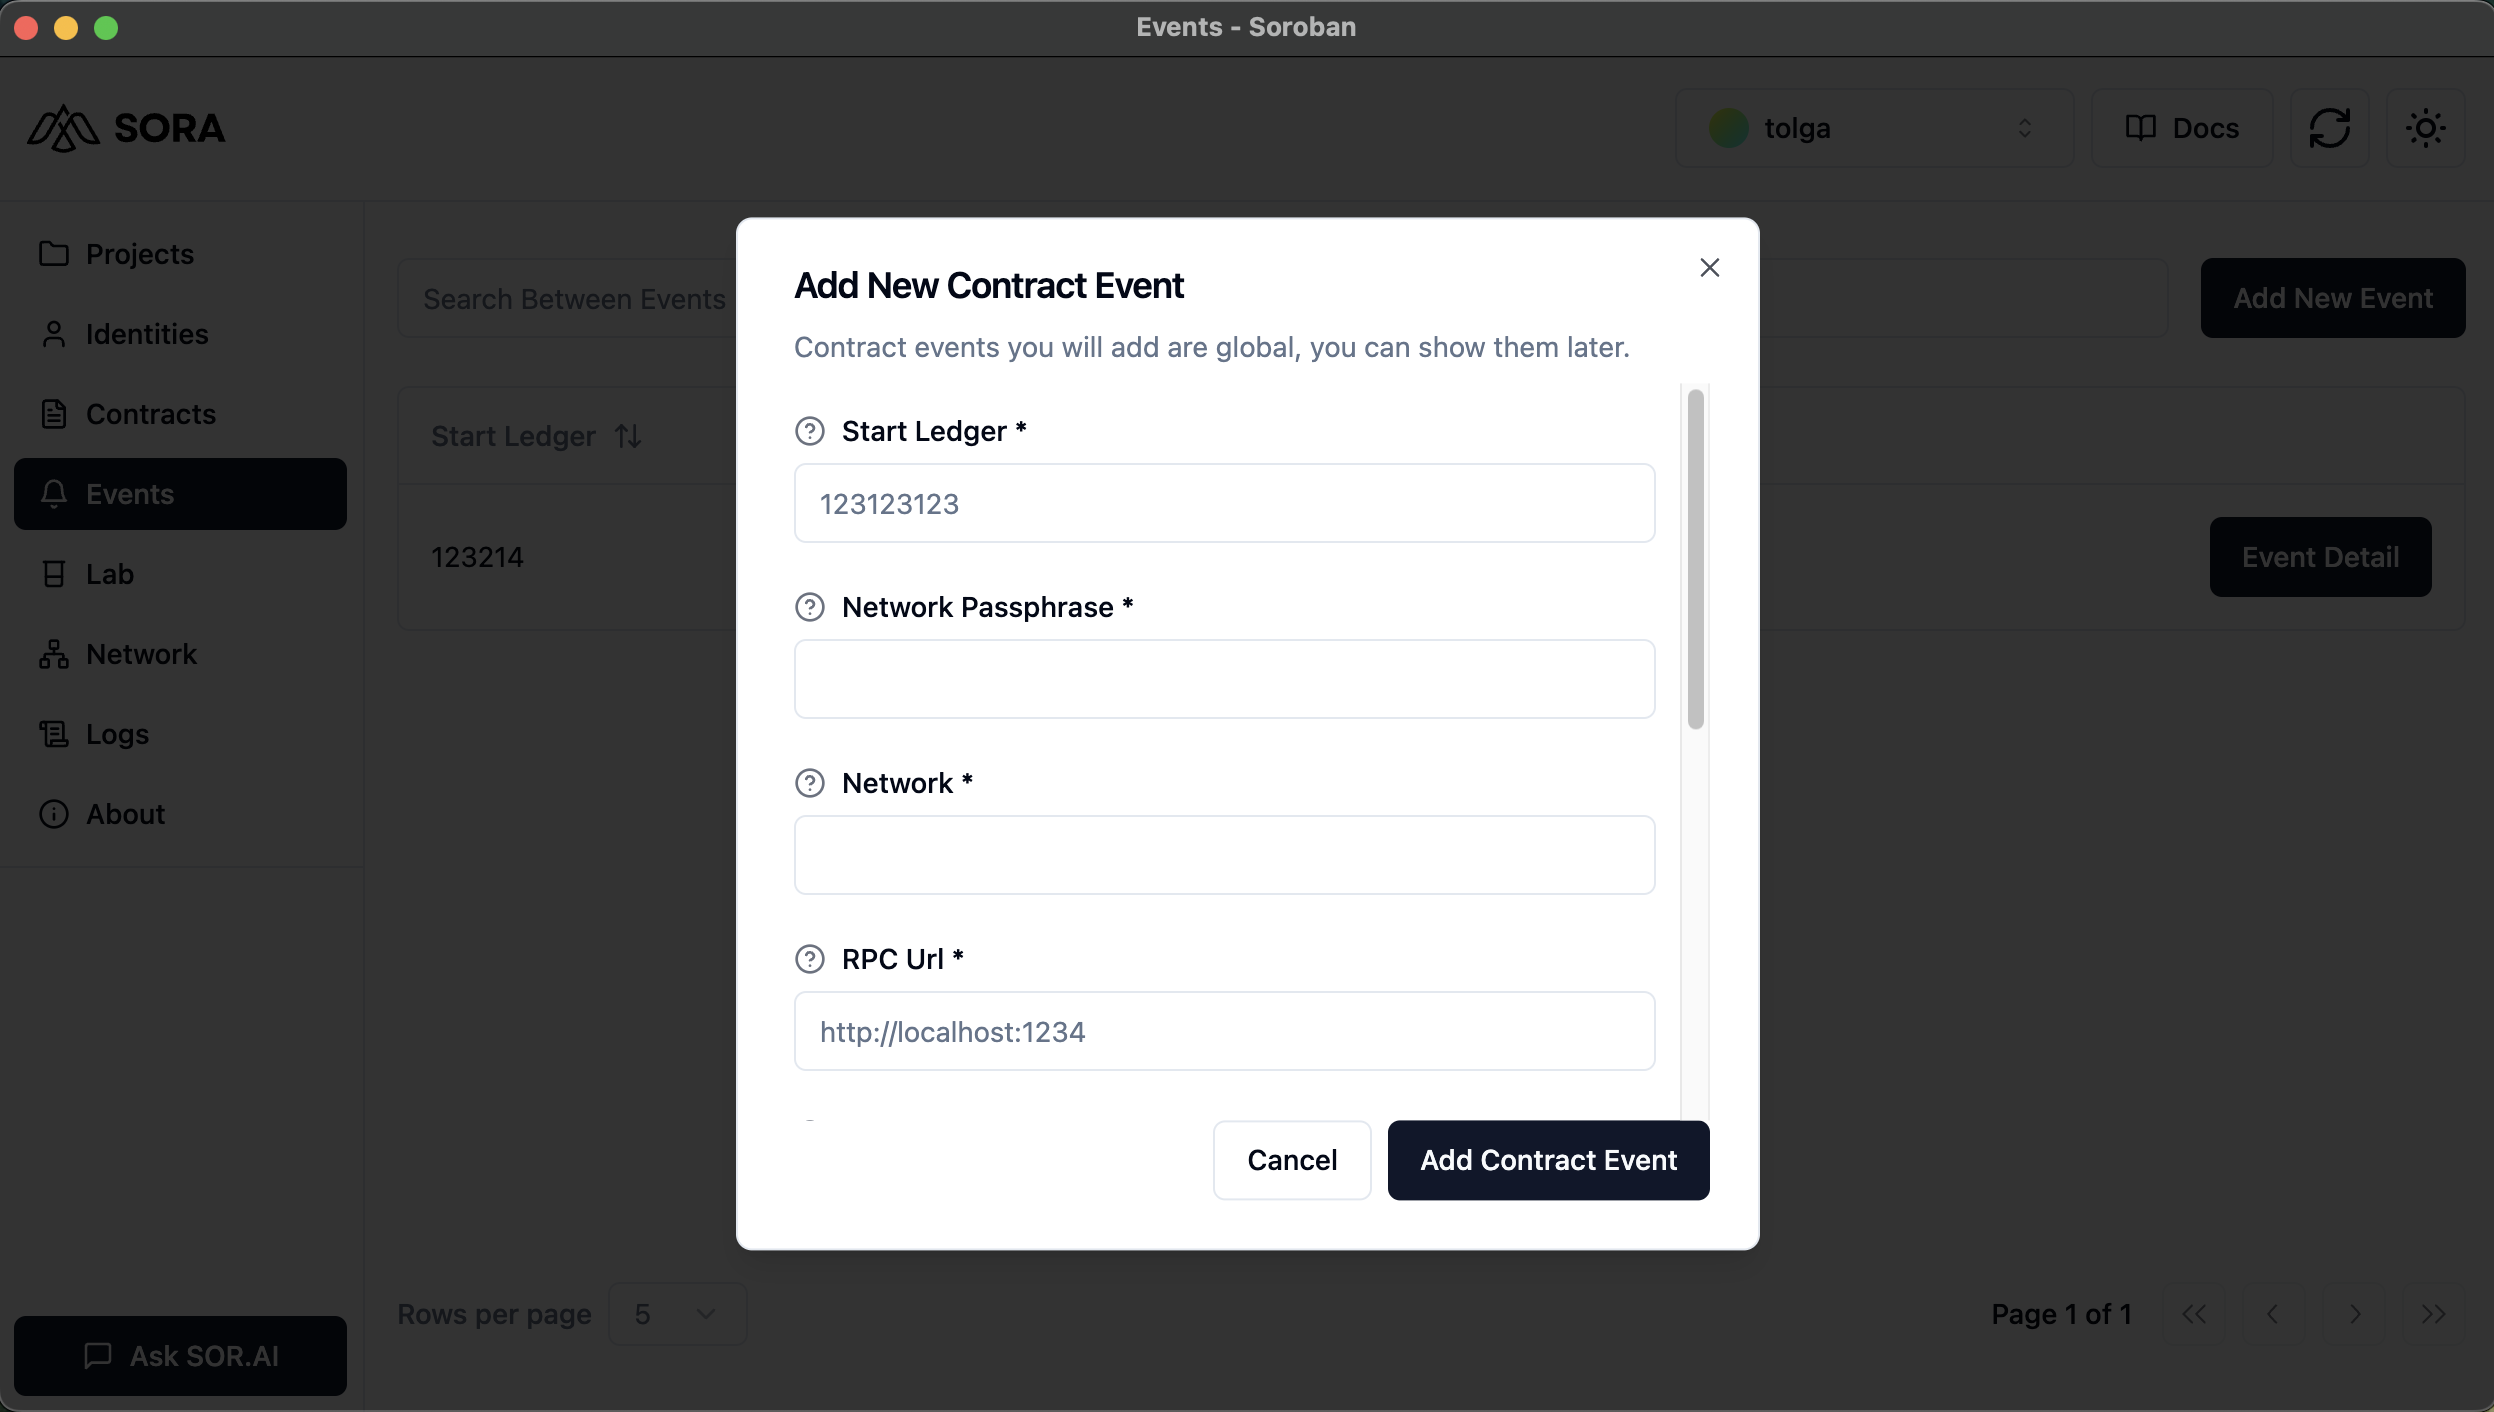
Fill in the following details:
- Start Ledger: The first ledger sequence number in the range to pull events.
- Network Passphrase: The network passphrase to sign the transaction sent to the RPC server.
- Network: Name of the network to use from the config.
- RPC URL: The RPC server endpoint.
- Cursor: (Optional) The cursor corresponding to the start of the event range.
- Count: (Optional) The maximum number of events to display.
Additional options are available under the "Filters" and "Testing Options" sections.
Event Details
To view details of a specific event:
- Click the "Event Detail" button next to an event in the list.
- You'll be taken to a detailed view of the event.
The Event Details page shows:
- Event Information: Start Ledger and RPC URL of the event.
- Edit Event: Button to modify the event configuration.
- Remove Event: Button to delete the event.
- Event Output: Displays the output of the Soroban CLI
eventscommand for this event.
Editing an Event
To edit an existing event:
- Navigate to the Event Details page.
- Click the "Edit Event" button.
- Modify the desired fields in the edit modal.
- Click "Update Contract Event" to save your changes.
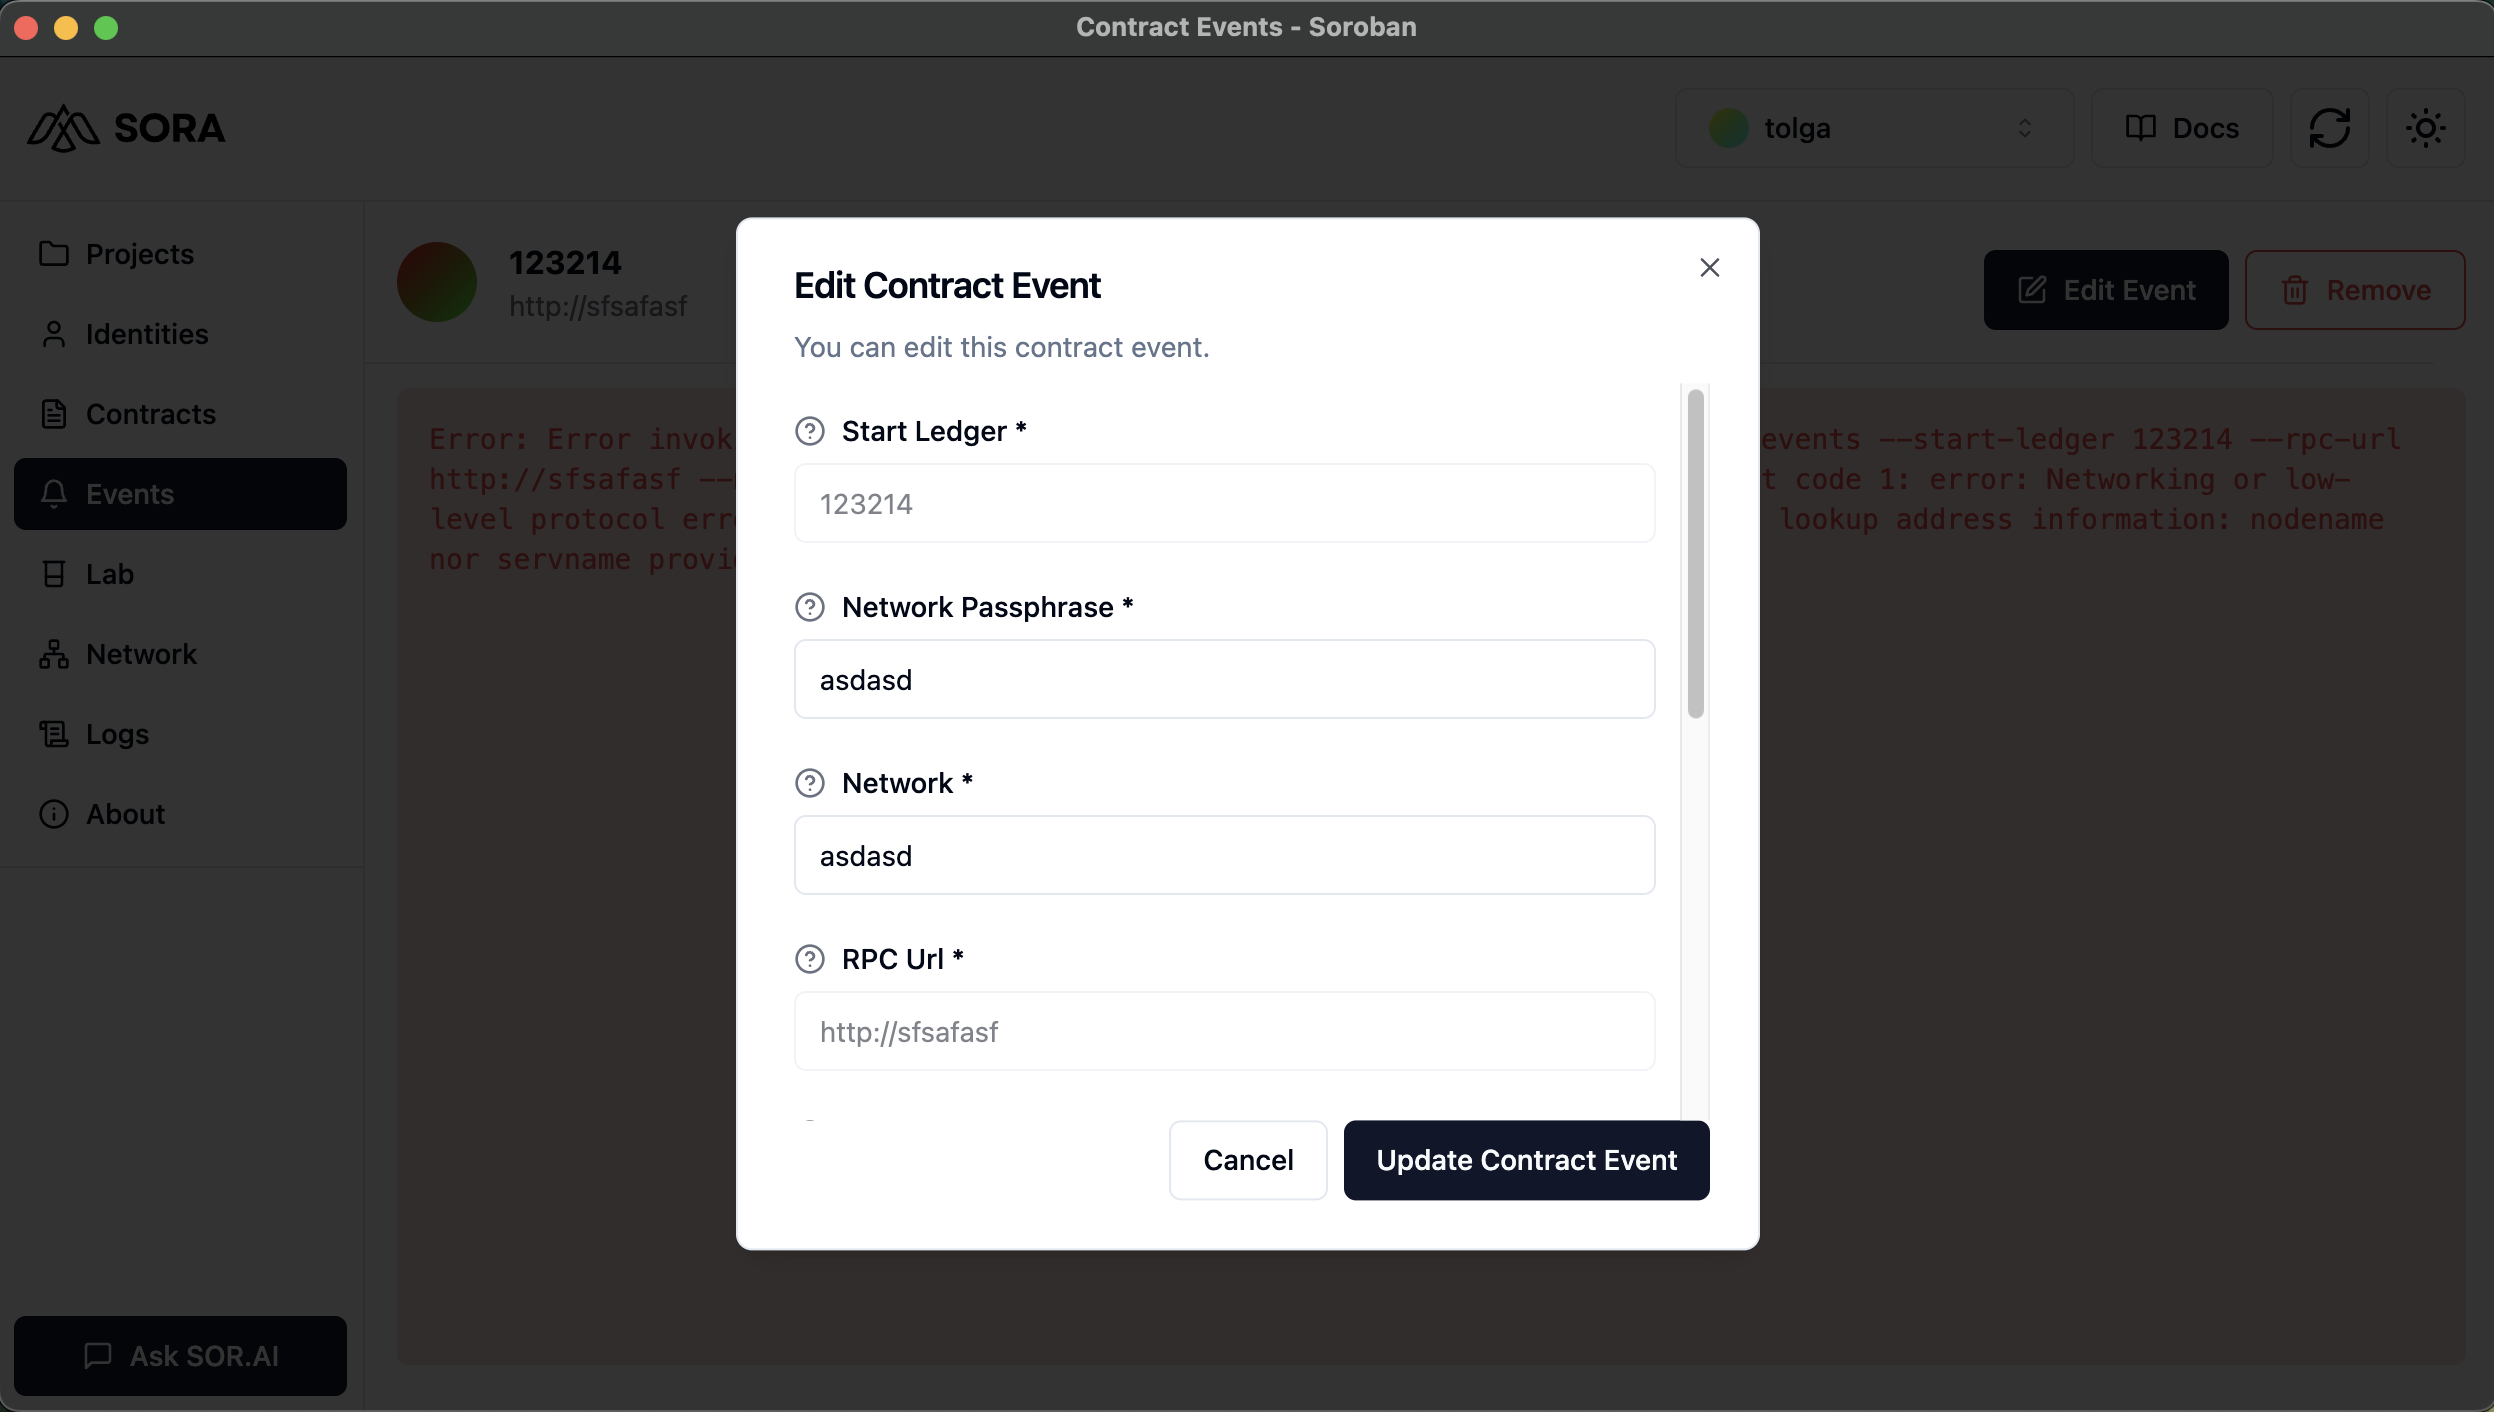
WARNING
Changing key fields like RPC URL or Start Ledger will cause the application to reload.
Removing an Event
To remove an event from SORA:
- Navigate to the Event Details page.
- Click the "Remove" button.
- Confirm the removal in the dialog that appears.
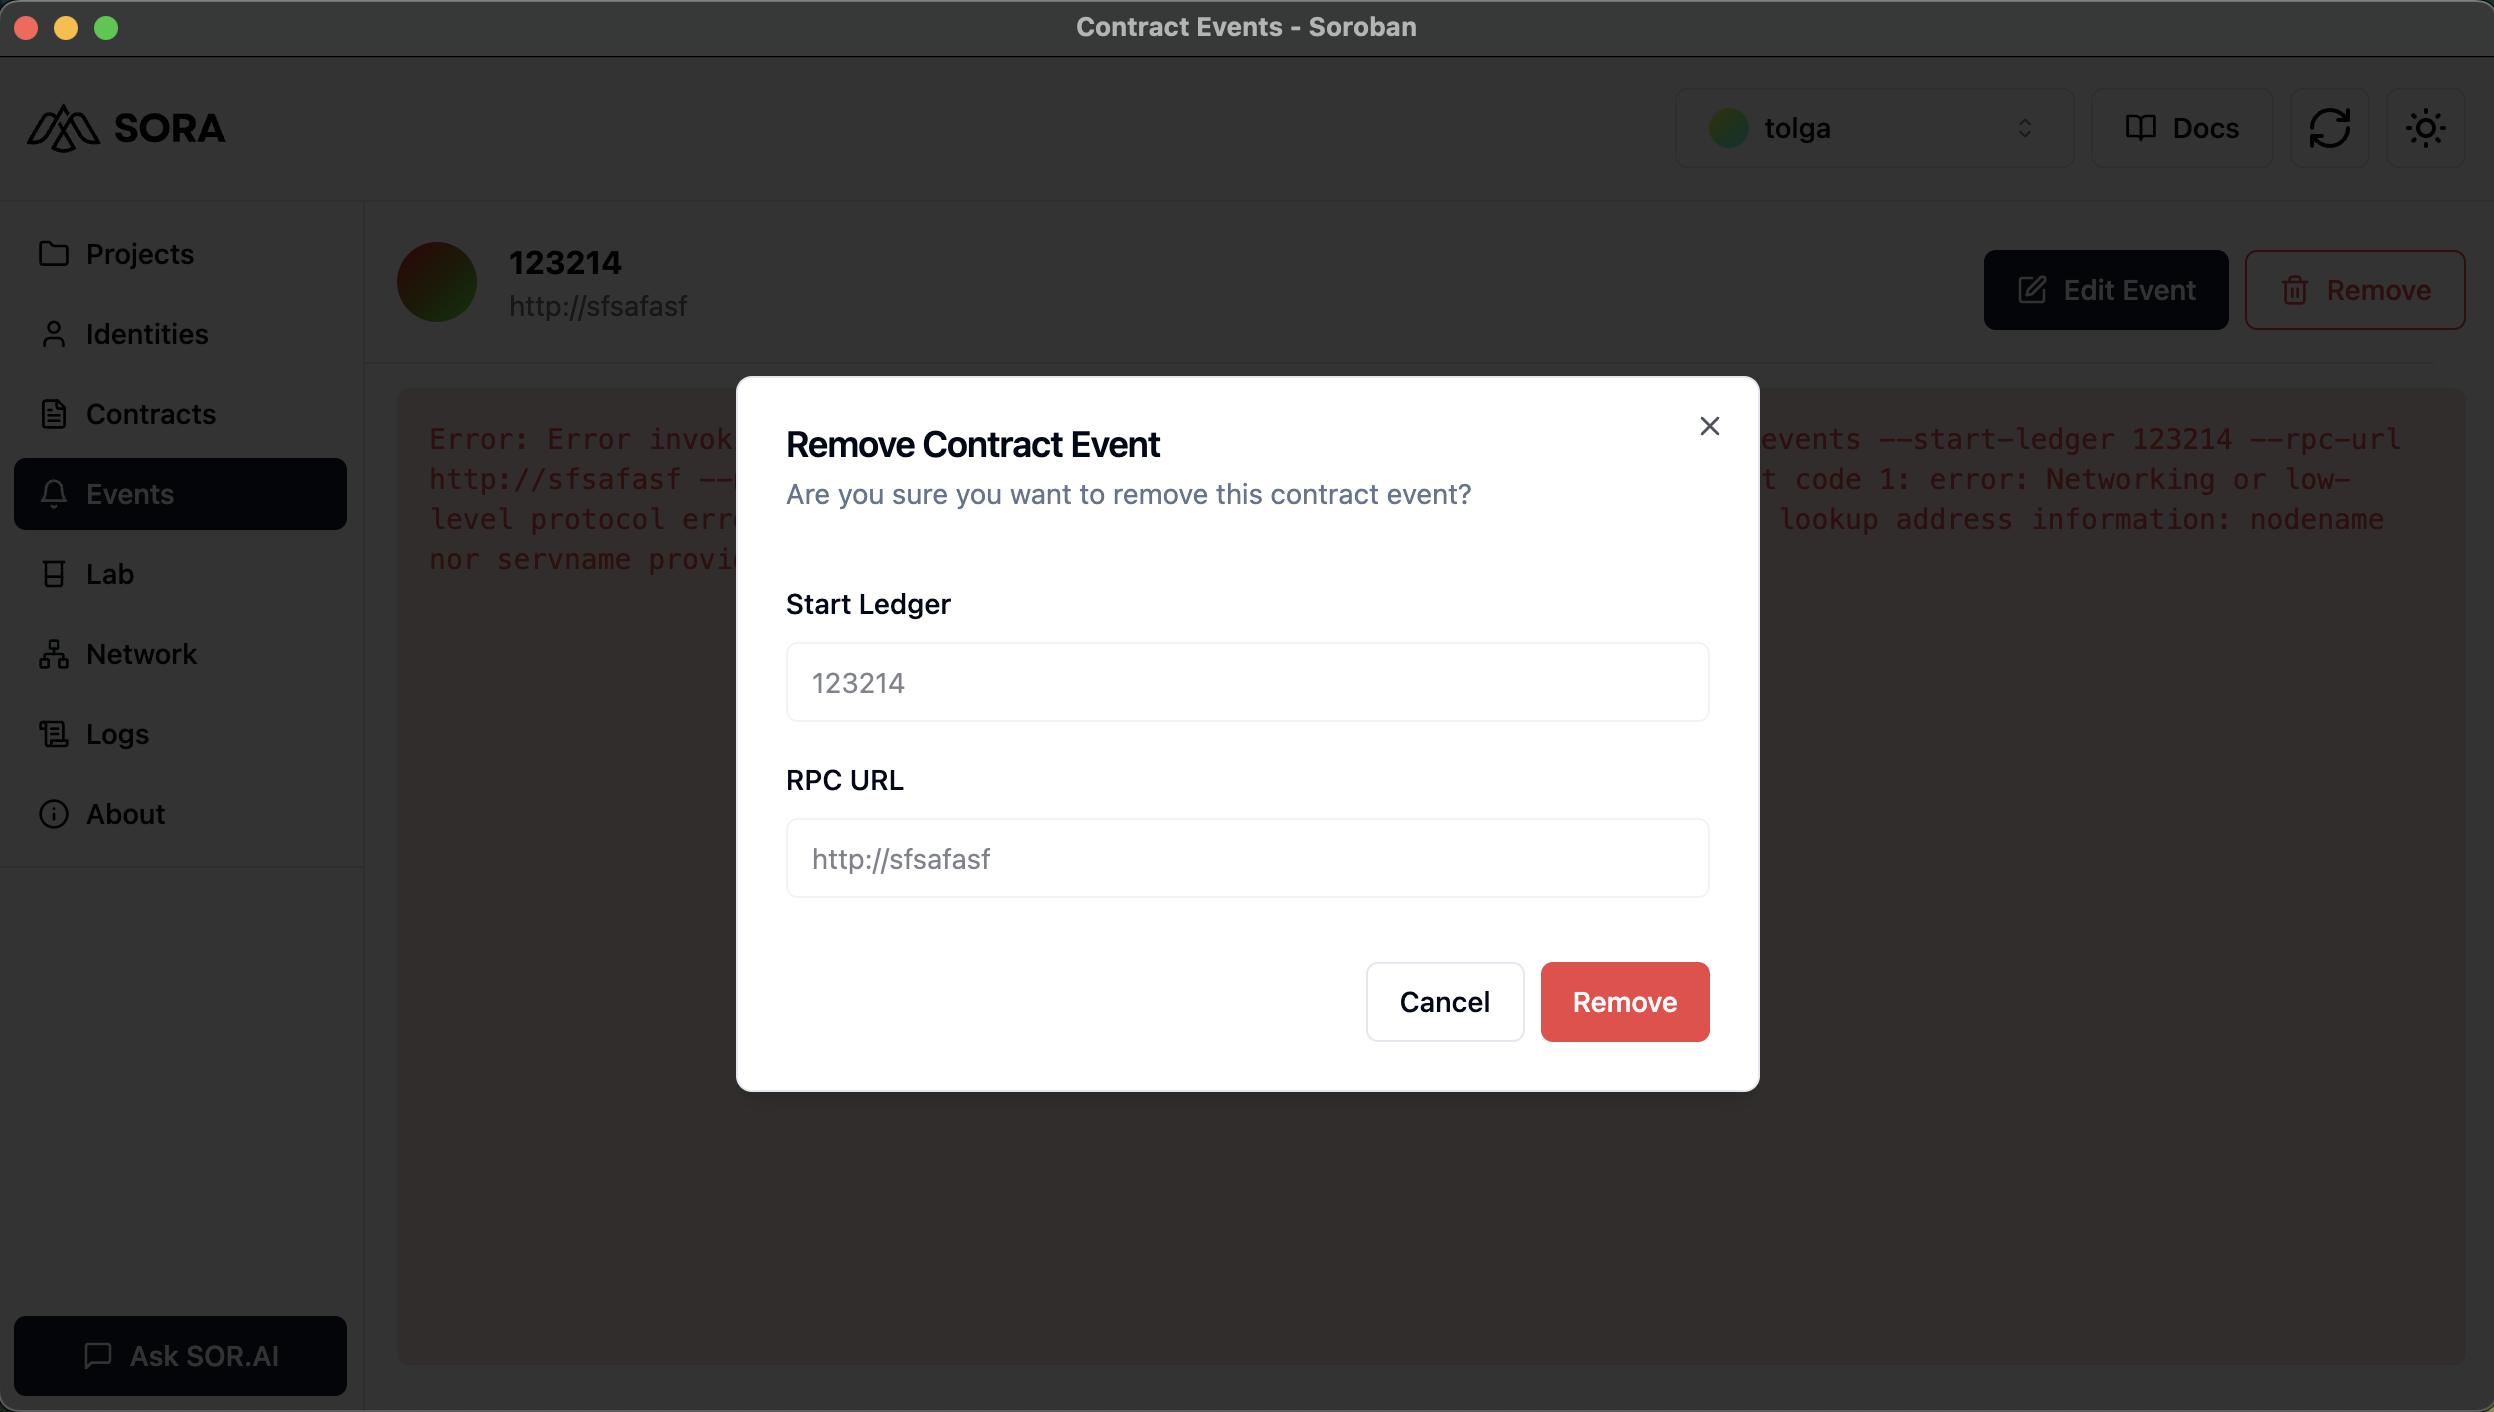
IMPORTANT
Be cautious when removing events. This action cannot be undone.
Best Practices
- Use Descriptive Names: When adding events, use clear and descriptive names to easily identify them later.
- Regular Cleanup: Remove events that are no longer needed to keep your dashboard organized.
- Use Filters: Utilize the filtering options to focus on specific contract events when debugging or monitoring.
- Monitor Performance: Keep an eye on the number of events you're tracking, as a large number may impact performance.
Behind the Scenes
SORA uses the Soroban CLI's events command to manage and display contract events. Here are some of the key operations performed:
stellar events: Fetch events from the networkstellar events --start-ledger: Retrieve events starting from a specific ledgerstellar events --contract-id: Filter events by contract IDstellar events --count: Limit the number of events returnedstellar events --cursor: Start fetching events from a specific cursor positionstellar events --event-type: Filter events by type (e.g., 'contract', 'system', or 'all')